Adjust and position windows
Applies to: viflow (subscription | 9) | Article: 1627328 | Updated on 12.12.2024
Various windows for viewing and editing objects, attributes and overviews can be opened in the viflow program interface.
The windows can be freely scaled, placed and glued to (almost) any position on the program interface. After starting the program for the first time, the Standard layout is displayed; the view last used is always loaded for subsequent starts.
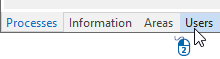
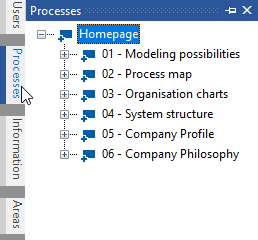
Open windows for processes, information objects, areas
When viflow is started for the first time, the windows for processes, information and areas are opened automatically. These three windows for the most important viflow objects can be called up directly in the View menu by activating the checkboxes. This view corresponds to the standard layout and can be accessed at any time via the menu ››› View – Layout.
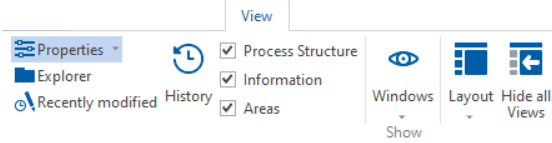
Open properties window
The Properties window is the main tool for editing and viewing the properties of all objects and definitions used in the process model. All data for the selected object or definition is entered here. The properties window is particularly important for maintaining the viflow main objects (processes, information, areas), which form the core of every process model.
There are different ways to open the properties window for the viflow main objects - processes, information, areas:
- By marking [
 ] of processes, information or areas in the process graphic and then clicking on the Properties button in the Start or View tabs
- By marking [
.png) ] of objects (not the folder) in the Processes , Information or Panes windows and then clicking the Properties button in the Home or View tabs
] of objects (not the folder) in the Processes , Information or Panes windows and then clicking the Properties button in the Home or View tabs
- Right-click [
 ] on objects (not on the folders) in the Processes, Process Structure, Information, Information Structure, Areas, Organisation windows or on these objects in the process graphic with subsequent selection of the Properties entry from the context menu
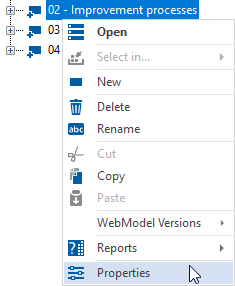

 ]in the Properties button.
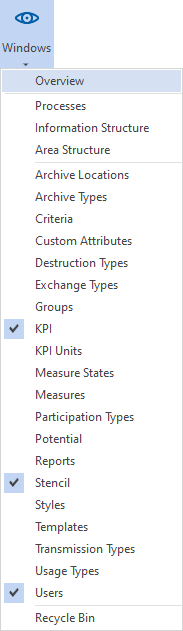
Open more windows
In the View menu, click on the Window button to open the following windows:
 |
|
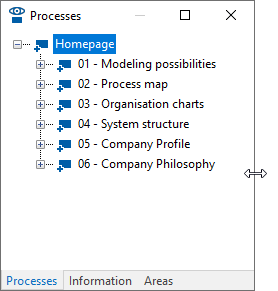
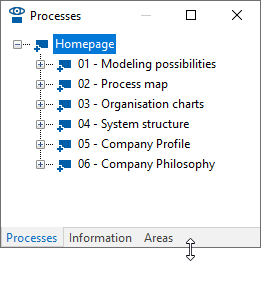
Change window size
Just like in other Windows programs, you can change the size of the windows as you wish. To do this, move the mouse pointer over the edge of the window and drag it while holding down the left mouse button [.png) ] either in width, height or diagonally to the desired size.
] either in width, height or diagonally to the desired size.
 |
 |
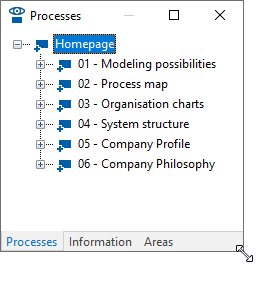 |
Scale the windows in height, width or diagonally
Loosen and glue the window
If you want to reposition a window, left-click on the window's title bar and, while still holding down the mouse button, drag it to the approximate desired position.
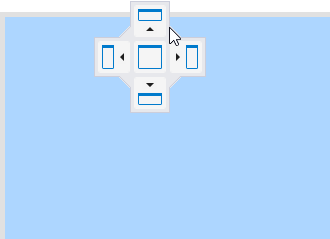
Then drag the window onto the appropriate positioning icon to place it at the top, bottom, right, left, or center of the entire target window. This allows you to nest windows within each other and form "window groups".
Hide windows automatically
If you want a window to auto-hide when not in use, click the pushpin icon in the window's title bar.
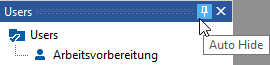
The title bar of the window is then glued vertically to the edge of the page and can be shown again with a click.
To undo this pin, click the (now horizontal) pin icon again while the window is open  .
.
Hide and show all windows
In the View tab you will find the button for the Hide all windows function.
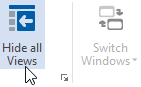
If the windows are hidden, you will find the Show all windows button in the same place to make them visible again.
Arrange windows
If several windows are open, these are displayed as tabs by default.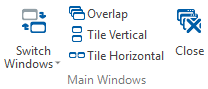
However, the windows can also be arranged one above the other or next to each other (this can be useful, for example, when using several monitors). To do this, click the Tiles or Tiles button on the View tab.
Display within the window
The view of the individual objects in the window can be selected with the List button or via the context menu [.png) ] to be changed.
] to be changed.
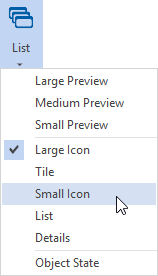
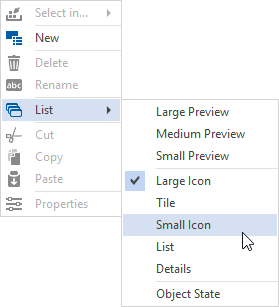
Choose here – as known from Windows Explorer – between different previews, icons, the list or detail view.
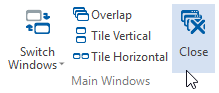
Close main window
If you want to close the main windows (eg all open graphics), click on the View tab in the Main Windows group on the Close button.
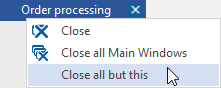
Alternatively, you can right-click the main window tab and from the context menu [.png) ] select one of the following options:
] select one of the following options:
- Close (only this window will be closed)
- Close all main windows
- Close all other main windows (only the current window remains open)
Close window and main window
To close a window, click the close icon [  ] at the top right of the title bar of the respective window.