Disable caching for viflow WebModels
Applies to: viflow (subscription | 9 | 8) | Article: 1342784 | Updated on 21.05.2024
After updating the WebModel, it may happen that the content of a previous export is displayed, since browsers or web servers cache the pages accessed so that they can be accessed more quickly when accessed again. If your WebModel does not show the current status after updating, you should clear the cache or disable it permanently. The cache behavior can be set both in the browser and on the web server.
Clear/configure browser cache
In principle, deleting or managing the cache works the same in the different browsers, but it can be found in different places:
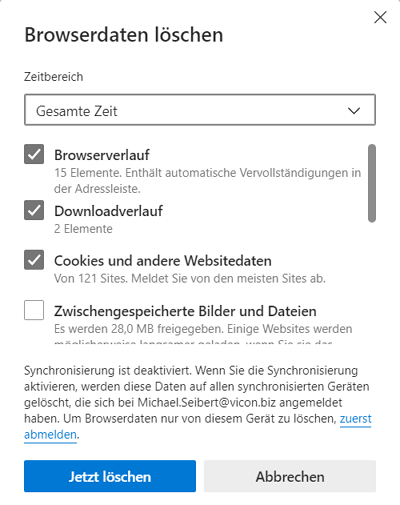
Microsoft Edge
Clear cache and cookies in Microsoft Edge
- From the menu bar, click Settings and more – Settings – Privacy, search and services – Clear browsing data – Choose items to clear.
- In the Clear browsing data window, select Browsing history and Cookies and other site data.
- Under Time range set All time and confirm with Delete now.
Google Chrome
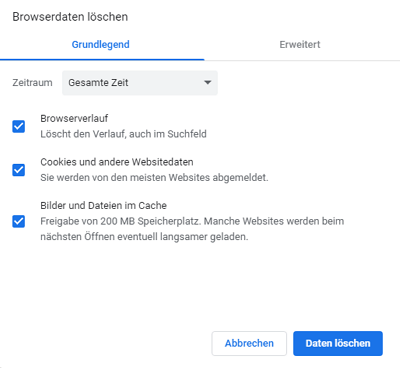
Clear cache and cookies in Google Chrome
- From the menu bar, click Customize and manage Google Chrome – Settings – Security and privacy – Clear browsing data.
- In the Clear browsing data window, select Browsing history and Cookies and other site data.
- Under Period set Total time and confirm with Delete data.
Mozilla Firefox
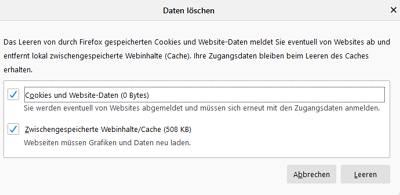
Clear cache and cookies in Mozilla Firefox
- On the menu bar, click Open Menu – Settings – Privacy & Security .
- Scroll to Cookies and Website Data and click Remove Data .
- In the Clear data window, mark the entries Cookies and Website data as well as Temporary web content/cache and confirm with Clear.
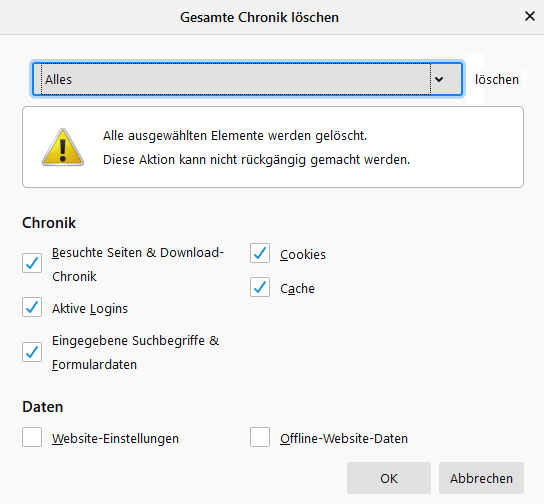
- Under Privacy & Security, scroll to History and click Clear History.
- In the Delete all history window, mark all options under History, select All (i.e. the entire time) in the drop-down menu and confirm with OK.
Disable cache on Microsoft's IIS (Internet Information Services).
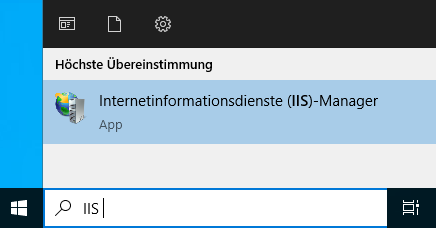
- Open Internet Information Services (IIS) Manager by searching for the term IIS.
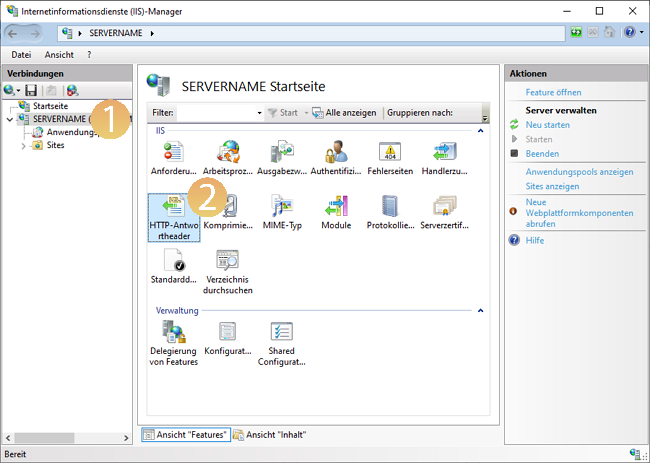
- Under Connections, select your SERVER NAME {{1}}.
- Open the HTTP Response Headers function by double-clicking {{2}}.
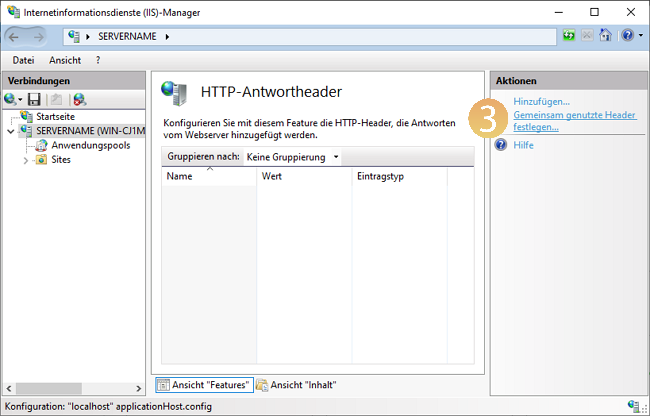
- Click Set Shared Headers … {{3}}.
- Enable {{4}} Web content expiration with the Immediate {{5}} option.
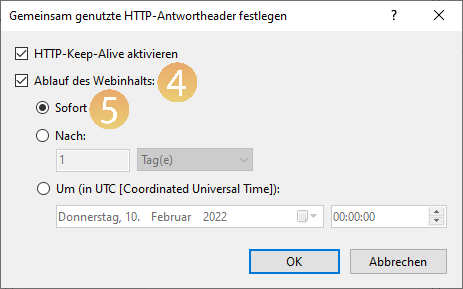
- Confirm by clicking on OK.
- Now select your SERVER NAME again under Connections {{6}}.
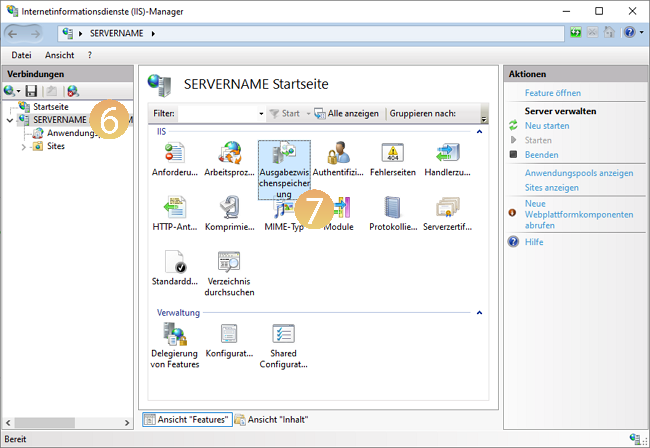
- Open the output caching function by double-clicking {{7}}.
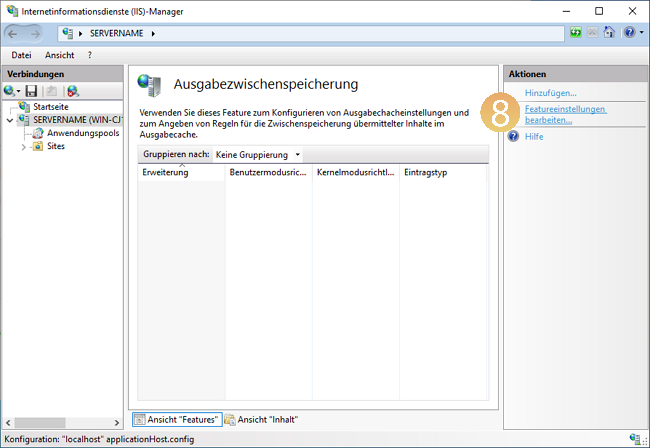
- Click Edit Feature Settings … {{8}}.
- In the Edit Output Cache Settings window, uncheck all {{9}} options.
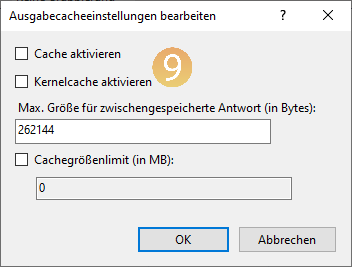
- Close the window by clicking on OK.


