Open local viflow WebModel
Applies to: viflow (subscription | 9 | 8) | Article: 1343384 | Updated on 18.07.2025
The viflow WebModel has a wide range of functions and must always be operated on a web server (e.g. the Internet Information Services (IIS) from Microsoft). This article describes how the WebModel can also be opened locally for test purposes.
System requirements for local operation of the WebModel
As on the web server, you also need an execution environment for local operation, which is installed with the "Hosting Bundle" {{1}}. Note here that different versions are required for viflow 8 and viflow 9/(subscription) (3.1 and 8.0):
viflow 8: ››› Download des "Hosting Bundle" (.NET 3.1)
viflow 9/(Abo): ››› Download des "Hosting Bundle" (.NET 8.0)
Open the viflow WebModel after the export
You can open the locally saved viflow WebModel after the export:
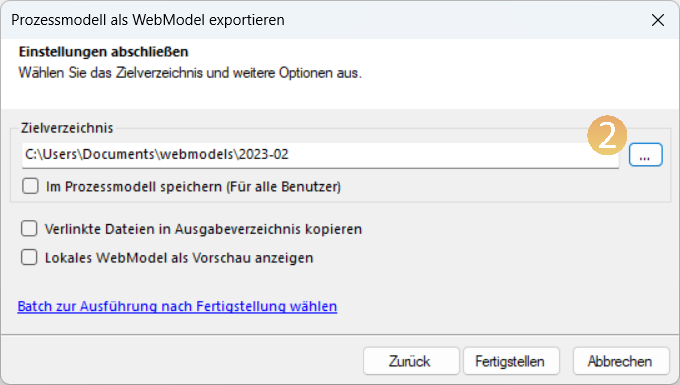
- In the export dialog under Complete settings, enter a local target directory {{2}}, here for example: "C:\Users\Documents\webmodels\2023-02".

- Click Finish.
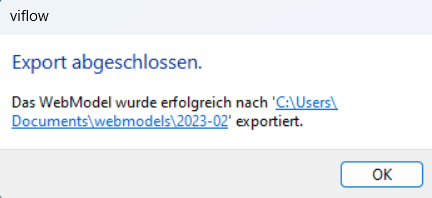
 Confirm the Export completed message with OK.
 - Now open the WebModel target directory in Windows Explorer.
Double-click the WebModel.exe {{3}} file. The WebModel is opened in the browser.
Control of the local WebModel – the WebModel Control Panel
With the WebModel or by double-clicking on the WebModel.exe file, the WebModel Control Panel for starting and ending the local WebModel is also opened – but you can also open this manually:
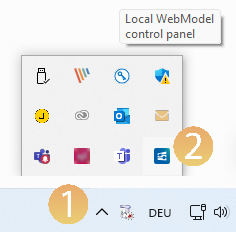
- Click the arrow icon [ in the lower-right corner of the Windows taskbar
 ] {{1}} to open the Windows notification area and click the WebModel Control Panel icon {{2}}.
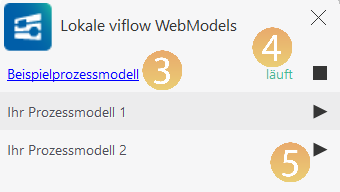
  The WebModel Control Panel opens:
- In the status display {{4}} you can see whether the WebModel is currently starting, shutting down or – as here – running.
- To display the local WebModel in the browser, click on the link or the process model name {{3}}.
- The WebModel is terminated by clicking on the stop symbol [
 ], started with the start symbol [
  ] {{5}}.