Turn off the login dialog when opening the WebModel
Applies to: viflow 8 | Article: 1342859 | Updated on 21.05.2024
When you open the personalised viflow WebModel, a login window appears in which you must enter your access data. These access data are required for the personalised WebModel. In this article, you will learn how to deactivate the login dialogue and thus the personalised WebModel.
Configuration of the browser through SSO login
The login dialog when calling up the WebModel can be suppressed without having to do without cockpit and personalization. Internet browsers can be configured in such a way that you are automatically recognized by the previous login to your system when you call up the WebModel and no further login is required.
This one-time sign-on is referred to as Single Sign-On (SSO) and can be activated or configured in different places in the individual browsers.
Deactivation of the login (without cockpit/personalization in the WebModel)
If you do not need the personalization and the functions in the cockpit, you can completely deactivate the login in the WebModel. To do this, please proceed as follows:
Customize the appsettings.json file
- Perform a WebModel export and open the target directory.
- Open the appsettings.json file with an editor – for example Notepad++ or the Windows Notepad.
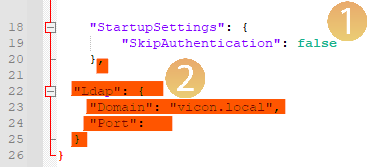
- Set the SkipAuthentication entry to true {{3}} before false {{2}}.
- Underneath, delete the text highlighted in red {{2}}:
"ldap": {
"Domain": "vicon.local",
"Port":
}

- Save and close the appsettings.json file.
- To ensure that the modified appsettings.json file is not overwritten during the next export, create a Customizations folder in the viflow program directory and a further WebApp folder in it.
For example (viflow installation in 64 bit): C:\Programs\ViCon\ViFlow\080\Customizations\WebApp - Copy the modified appsettings.json file to the WebApp folder.
Check Windows Authentication (active?)
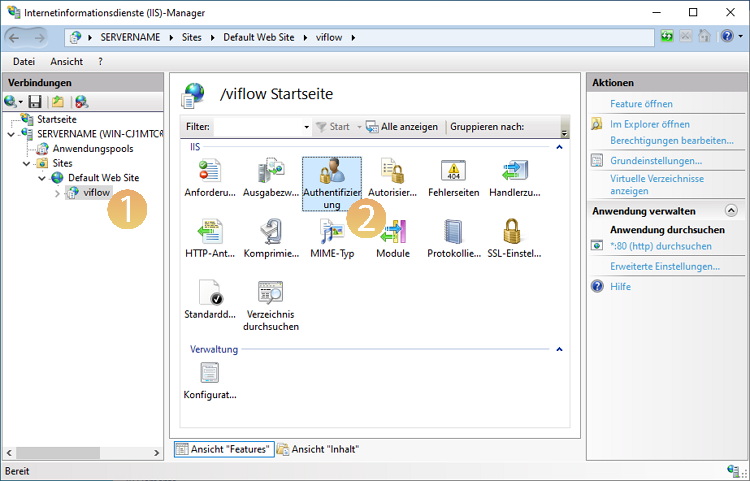
- Open Internet Information Services (IIS) Manager on the server.
- Under SERVERNAME – Sites – Default Web Site, click on the application (here: viflow) {{1}}.
Open the item Authentication with a double click {{2}}.

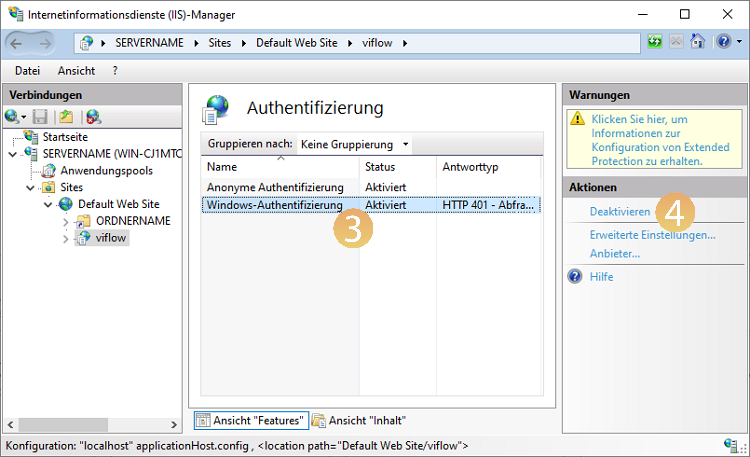
Click on Windows Authentication {{3}} and check if Enabled is displayed in the Status column.
If this is not the case (i.e. Windows Authentication is Disabled), click Enable {{4}} under Actions on the right.
Save the changes if necessary.
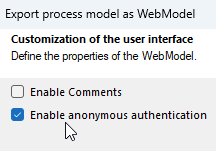
 This automatically creates an "anonymous" – i.e. non-personalised – WebModel.